The instructions found in this page are specific to the regular or invited papers and tutorials. Instructions for the poster session can be found here.
ONDM 2021 recommends the use of Zoom to record your presentation.
Please consider the instructions below and feel free to contact the ONDM organization if you have questions through the email ondm2021-chairs@edas.info.
Topics on this page:
- Presentation time
- General guidelines for slide preparation
- Instructions for using Zoom Recording Feature with presentation
- Instructions for uploading your presentation
Presentation time
When preparing your slides and recording your presentation, keep in mind the time allocated for your talk:
- Regular papers, 20 minutes total: 18 minutes for presentation + 2 minutes for Q&A.
- Invited papers, 30 minutes: 25 minutes for presentation + 5 minutes for Q&A.
- Tutorial, 1 hour: 55 minutes for presentation + 5 minutes for Q&A
- Poster papers do not need to record a presentation. More instructions about the poster session can be found here.
General guidelines for slide preparation
We would prefer to receive you in Gothenburg and watch your contributions in person. Unfortunately, this will not be possible.
So, we have compiled a few useful guidelines to make sure that your presentation is more engaging, effective, and clear, to represent your research in the best way possible.
- All presentations should be in 16:9 format.
- Always make sure you have good contrast between text and background. A dark background goes with light text color and a light background with dark text.
- Avoid serif fonts such as Times New Roman, use sanserif fonts such as Arial.
- Do not use small font sizes, it is better to add an extra slide so that the readability is good.
- If you have to use a font smaller than 20, make the font Bold.
- Never use a font size smaller than 15.
- The same goes for Lines, Arrow, etc. Use a minimum of 1.5 points.
- Always end the presentation with a blank slide.
Using the Zoom Recording Feature
Creating your Zoom account
If you have an account in Zoom, log in using your existing account. If you do not have an account in Zoom, you need to create one. It is free.
- Go to https://zoom.us/signup or https://zoom.com.cn/signup (depending on your region), and select “Sign up”.
- Sometimes it might ask for your birth date.
- Enter your email address and wait for the confirmation email.
- Open the confirmation email from your inbox, and activate your account.
- Introduce your personal data and choose a password for your account.
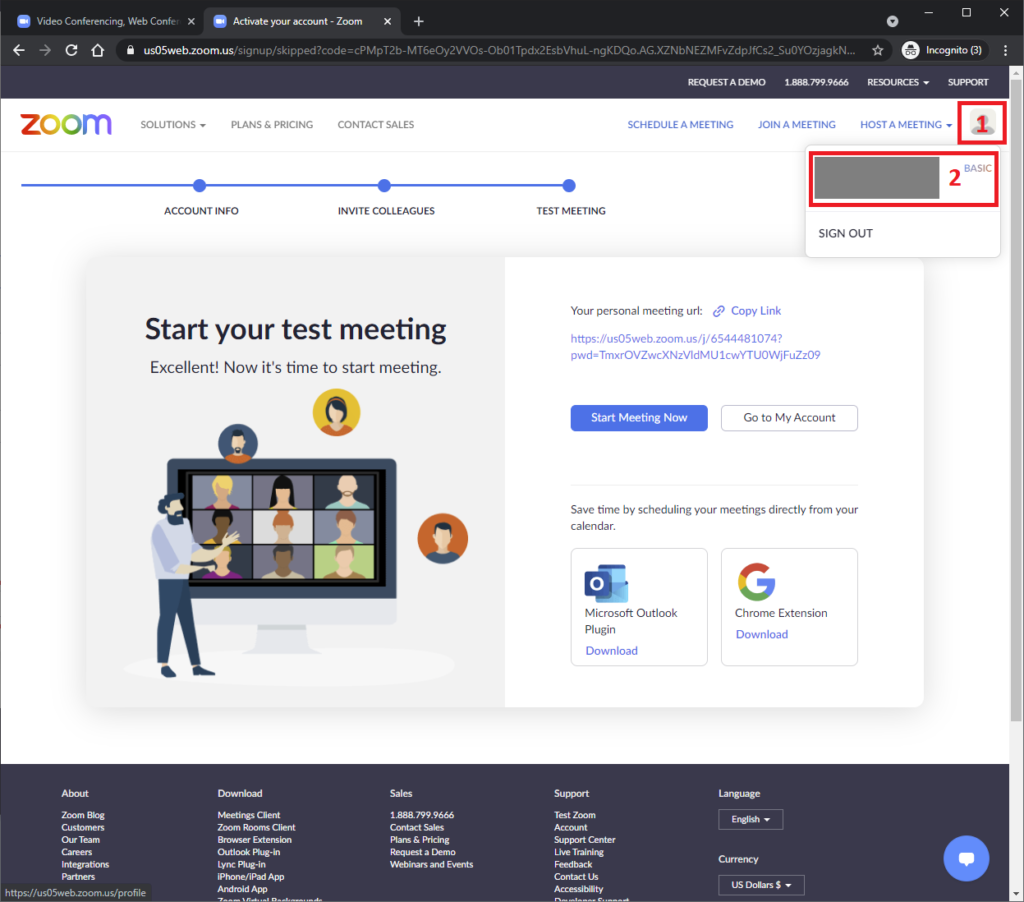
- You can skip the “Invite Your Colleagues” step.
- View your profile by clicking on “Go to My Account”.
Recording your presentation
Once you have your slides ready, follow the steps below to record your presentation. Note that the screenshots were taken on a computer with MS Windows. If you have a computer with macOS the screen might look slightly different but the same instructions apply.
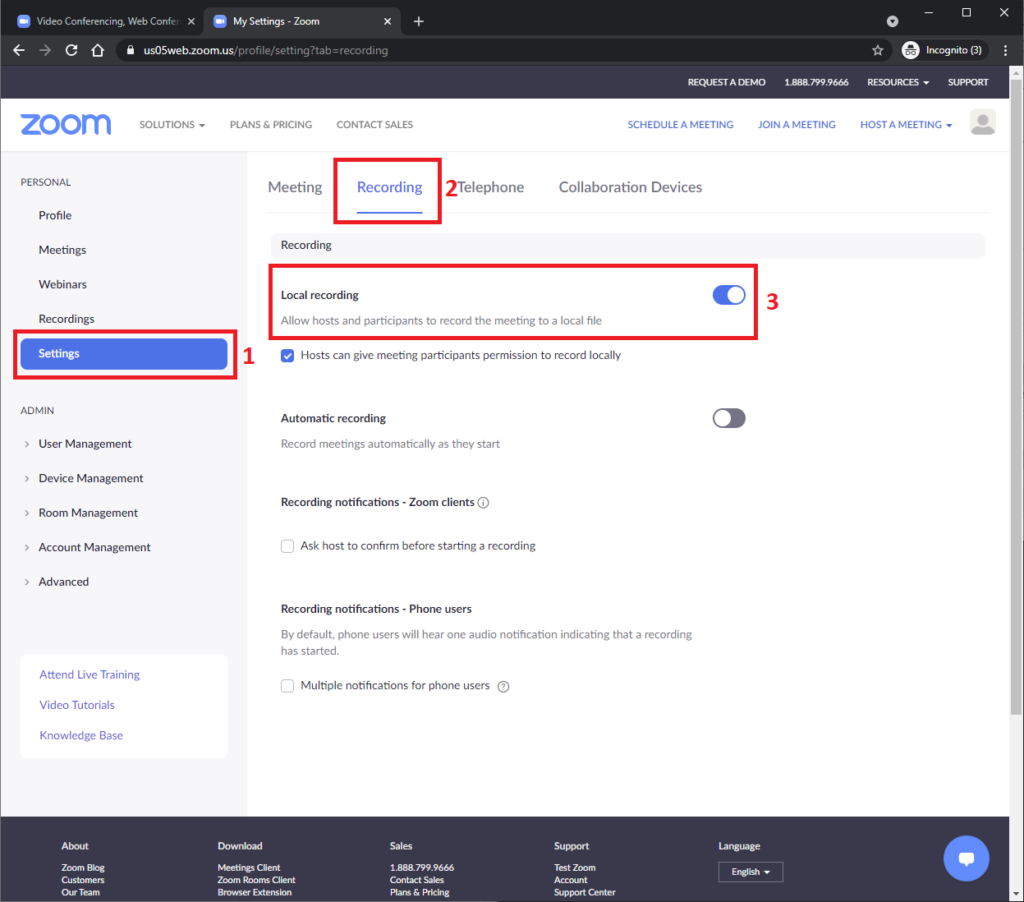
1. Go to your Zoom profile (Zoom webpage).
2. Click on “Settings”, and select the “Recording” tab. Be sure that Local recording is on.
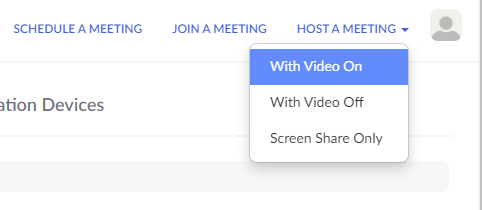
3. At the upper right corner, it will say “Host a Meeting”, click on “Host a Meeting with Video”, and follow the provided instructions to download and run Zoom. If you already have Zoom installed on your computer, Zoom will open automatically.
4. Once the Zoom application is running, click on “Join with Computer Audio”. Be sure that your audio and video are both on and working. The video is required in order to ensure a high‐quality experience for the audience.
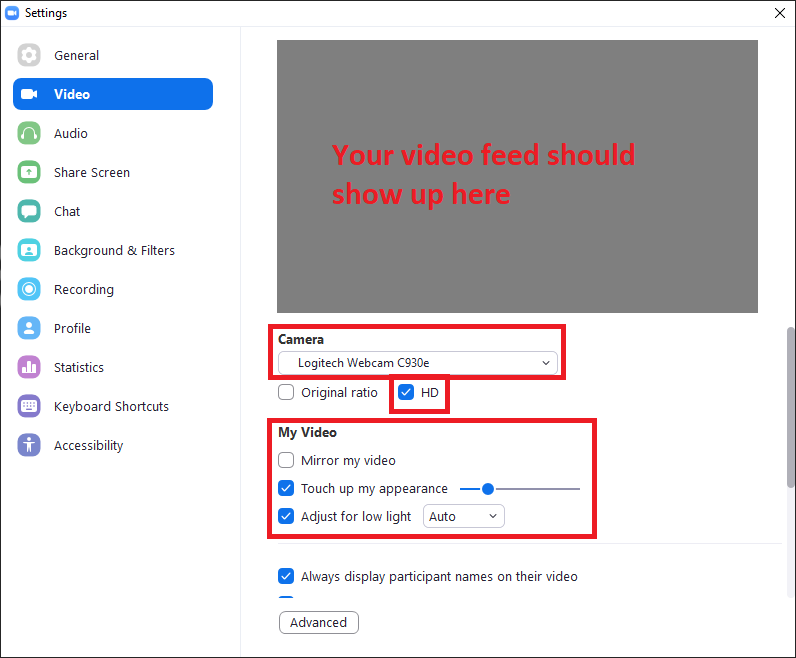
5. Open the video settings in the lower left corner where you mute/unmute the camera and select “Video settings”.
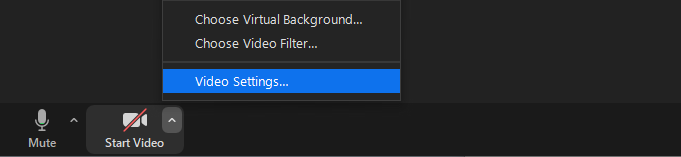
6. If you have more than one camera, make sure to select the correct one. Make sure that the HD box in the middle of the screen is ticked. Tick the “Touch up my appearance” box and adjust the level to about 25%. If the image video is a bit dark, tick the “Adjust for low light” box and leave it on “Auto”.
7. Start your slides on presentation mode.
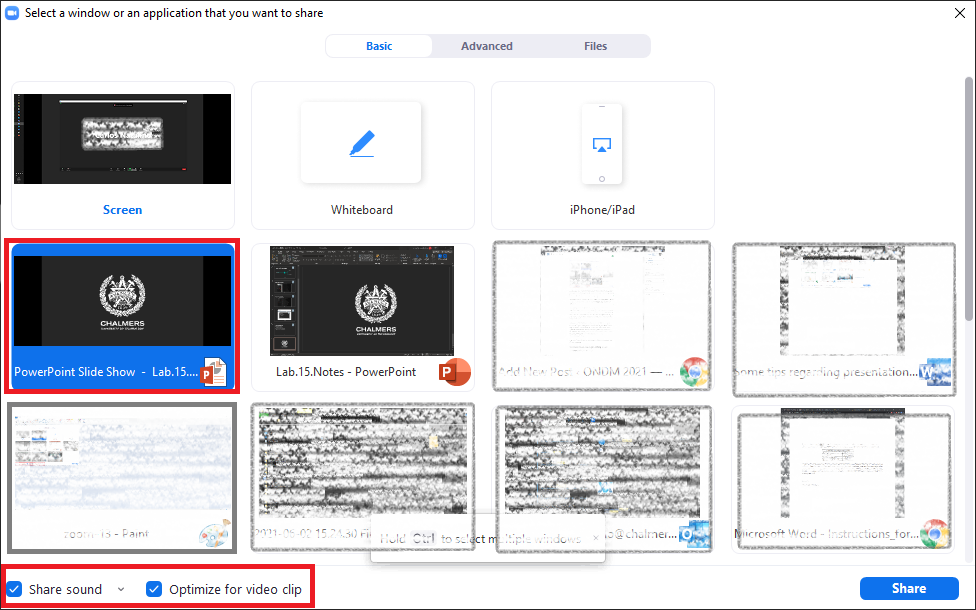
8. Click on “Share Screen” at the bottom center of the Zoom window.
9. Select your presentation (if you are using PowerPoint, it shows as “PowerPoint Slide Show”). Make sure to enable the “Share computer sound” and “Optimize Screen Sharing for Video Clip” options.
10. Once you start screen sharing, your video will move to the upper right‐hand corner, and it may potentially cover text or images. Please, adjust your presentation accordingly.
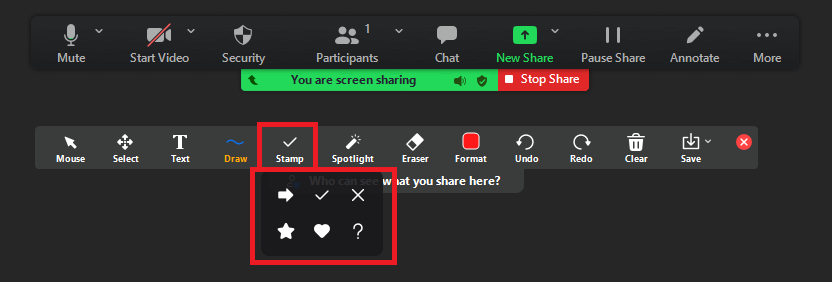
11. Become familiar with the Zoom tools available at the top/bottom of your screen. We encourage the use of the embedded laser pointer during the recording, available in the “Annotate” button. You can select the “Spotlight”, “Arrow” and “Vanishing pen”.

12. If appropriate for your presentation, Zoom also provides “Stamp” functionality that can make your presentation even more engaging.
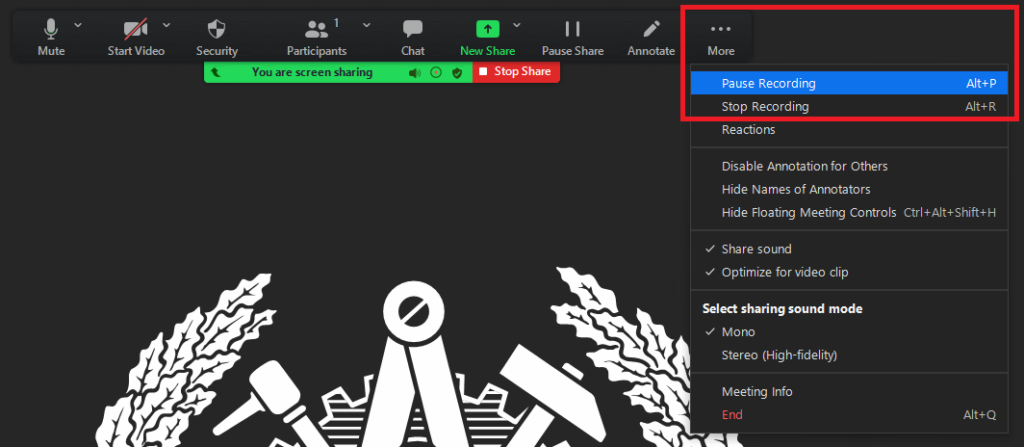
13. Stop sharing the screen and press the “Record” button. Select “Share Screen” again and begin your presentation. Since Zoom does not show explicitly the recording time, we recommend you use an external time to keep track of the time.
14. During a Zoom recording, you can Stop or Pause the recording. If you stop the recording and start it again, a new video file will be created for the next recording segment. But If you pause the recording and start it again, Zoom will record to the same video file for the recording segment.
15. Once you have finished your presentation, you can either select “Stop Record” and then end the meeting, or simply end the meeting and it will stop recording for you. It will begin to convert your video to your local system into three files. Those files (.m4a, .m3u, and .mp4) will be saved to the destination folder that you have to select when the conversion process finishes. By default, the recordings are saved within your “~/Documents/Zoom” folder.
16. Make sure your recording has the appropriate presentation time according to your talk.
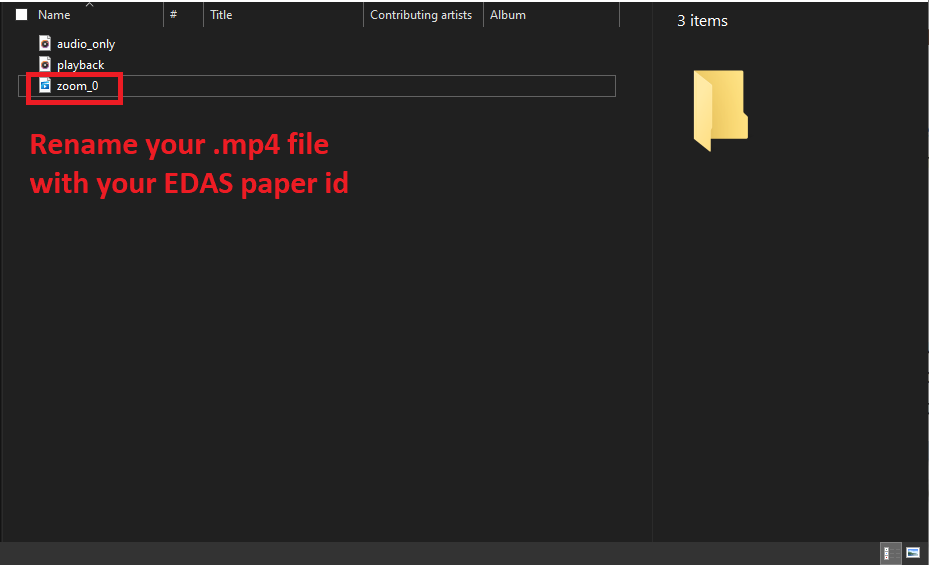
17. After the recording is processed, the destination folder will appear in your file explorer. Open the “zoom_0.mp4” file (if you have recorded more than once, the number can be different from zero) and check if your recording has audio and video working correctly. If so, rename the file with your EDAS paper ID.
Authors with more than one accepted paper will have to record one .MP4 file per presentation.
Instructions for uploading your presentation
The instructions on how to upload your recording(s) will be sent directly to the authors. If you have not received the instructions, please contact us through ondm2021-chairs@edas.info.